Showing posts with label Sculpting. Show all posts

Friday, 19 April 2013

Blockman Returns

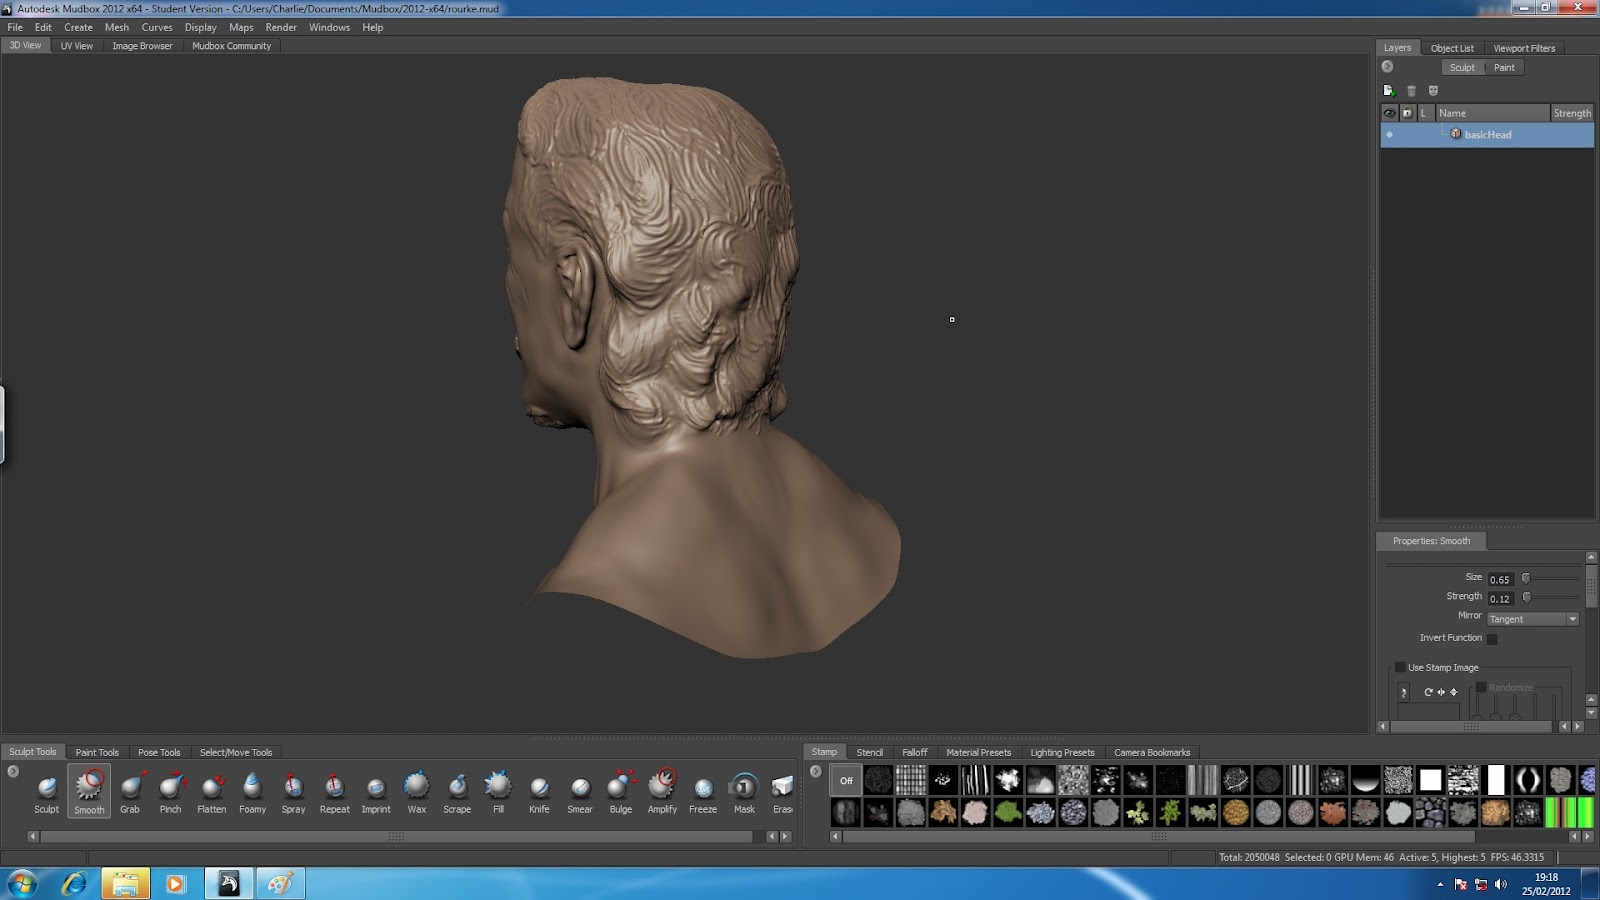
     This post is going to ducument the sculpting work I have been doing with my character, carrying on from the last post I had just imported my model from maya to zbrush. Being new to the program it took me a while to learn some of the basic features eg. how to stay in 3D mode, models must be saved as tools etc. But once this was out of the way I was ready to go.
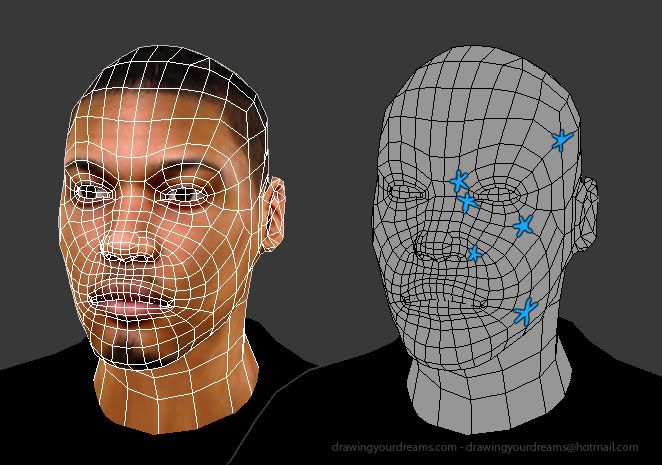
      I was advised that a good place to start with model was to use poly painting to point out the "bony landmarks". With these in place it becomes much easier to sculpt the form based upon its skeletal structure.
 
The main focus is on the parts of the skeleton that are going to have a prominent effect upon the shape of the human form. I used reference images of skeletons that I found in magazines such as "Men's Health" to guide me on the positioning of the skeleton.
    
      The main focus at this point is to split everything up into different planes, which will make it easier to sculpt on to them later. With this in mind I am mostly using the trim brushes which allow me to scrape away bulk or layer it up but still keep the surface flat.
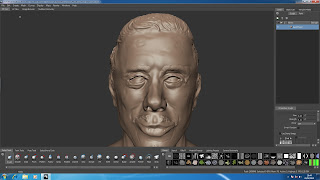
           Once I had a basic form to work with I was able to use the "Ecorche" muscle and tendon brushes, obtained from the cd which accompanied the book I am using, and with this I was able to paint on the different different muscle groups. It pays to have some knowledge of the human anatomy at this point. I take part in sports such as powerlifting and boxing so I have some degree of information about the names and posititions of some of the different muscle groups, However I also used books to guide me on this.
      The image below shows the basic muscular sculpting on my model. I could spend longer on it trying to get it perfect however it will mostly be used to create the mesh for the different items of clothing my character will wear. Therefore at least for the time being I will be leaving it as it is in order to move on to the next stage.


Sunday, 26 February 2012

Topology

     After finishing our sculpts we were required to create a paint layer over them displaying our understanding of Topology. To give myself a decent understanding and further what I had learnt within our group session I found the information in the following post to be particularly helpful. - http://www.polycount.com/forum/showthread.php?t=80005


        What I understand now about topology is that, as a general rule, the intention is to avoid the inclusion of triangles, primarily because they tend not to deform well which becomes problematic should you wish to animate your sculpture. Instead one would try to keep the shapes as quads, however this can be difficult when the contours of the face start splaying off in different directions. At this point you may include "5poles". This is where the edges of five quads meet to form a polygon cluster (These are highlighted on the picture above). Whilst they can also be detrimental to animation, this tends to be less so than with triangles.
     Armed with this knowledge I then attempted to draw out the Topology on my own sculpture.


    Result: He looks like a Mickey Rourke/ Spiderman hybrid. Using the website as a guide I did my best to keep the 5poles to a minimum and within the areas they would be least inconvenient. I did not enjoy this exercise.

Mickey Finished

     The time has come. I have finally got my scuplture to (roughly) where I want it. Witness for yourselves..

     I am pretty happy with my progress in this area, particularly seeing as it is my first time using Mudbox- and I feel as though I have at least achieved a reasonable likeness. As mentioned in my earlier posts I did find the eyes a struggle so this is something I will focus on practising for the future; however I really enjoyed using the program so I am more than happy to do this. Whilst playing around with different features in my free time I also learned how to give the sculpts joints, and therefore intead to start creating 3D sculpts of characters I have been creating/drawing in my own time.
     Another aspect I didnt explore too much this time round but would like to become familiar with in the future is various methods of texturing/colouring the surface so as to create a truly realistic effect.

Friday, 24 February 2012

I can see clearly now

     I spent more time than I should have in the last couple of days trying to get the eyes right on my Mudbox sculpture

     As you can tell form the picture it is still not going great. I bring you this not so much as a progress report but more a prewarning that it may well go pear shaped.

Hungry Eyes

     These are Mickey Rourke's eyes. There are many like them but these are his. Without him his eyes are useless. Without his eyes he is useless...
     In general I feel like I have taken to Mudbox pretty well, and considering this is my first ever use of it I think I am making good fast progress. The one area I am significantly struggling with is sculpting the eyes. The reference picture I am using has many creases and folds around the eyes which is probably not helping. I have begun looking for tutorials that will help me in this area. This is the best I have come up with- http://eat3d.com/free/mudbox_head
     At this point I will just have to persevere with it and keep trialling methods untill I get it right.

Mickey Rourke's Face

     As promised I spent a good week making full use of the Uni facilities to sculpt my mudbox character. At this point however my new computer has arrived so I also have the option of working on it at home now. This is the point I managed to get to within my college sessions
     The blue marks within the image shows where areas have been "frozen" in order to retain their likeness.
     The image above is what I have chosen to use for my reference pic. I chose a mugshot photo so as to give myself a decent front and side profile. I chose to sculpt the actor Mickey Rourke. The upside to this is that I have watched several of Rourke's films and should therefore be reasonably familiar with his appearance. The downside is that Mickey's face happens to be a vast collection of botched plastic surgery and severe facial trauma from  his boxing days, not completely unlike the aesthetic style one might expect were they to take a pack of bacon and mercilessly beat it for a good half hour using a crowbar and a rubber mallet. That said it made the task interesting to say the least. I had to also be aware that there is very little symmetry in his face, and therefore using the symmetry tool in Mudbox was largely not appropriate.

Wednesday, 22 February 2012

MUDBOX!!!!

     Since my last post we have begun using Mudbox. As with Maya we have recieved a basic introductory session, walking us through the major features of the program. We have been set some time to play around with the program, before we begin our own project where we will be required to sculpt the likeness of a real person. As my current computer at home cannot run Mudbox, I will be making much more use of uni facilites this term, and accordingly will be saving my animation work for the evenings at home.