Sunday, 10 February 2013

Contextual catch up.


We had a meeting last week with Sharon to discuss our contextual studies and how we have progressed so far with this. We were asked to evaluate what kind of essay we would need to write to suit our question. I decided mine was mostly a focus upon a change in industry but it would be required to mention how this has been made possible through changing technology, as I am focusing on the way that game saving has changed the nature of gaming.
     Some important points I am looking at are:
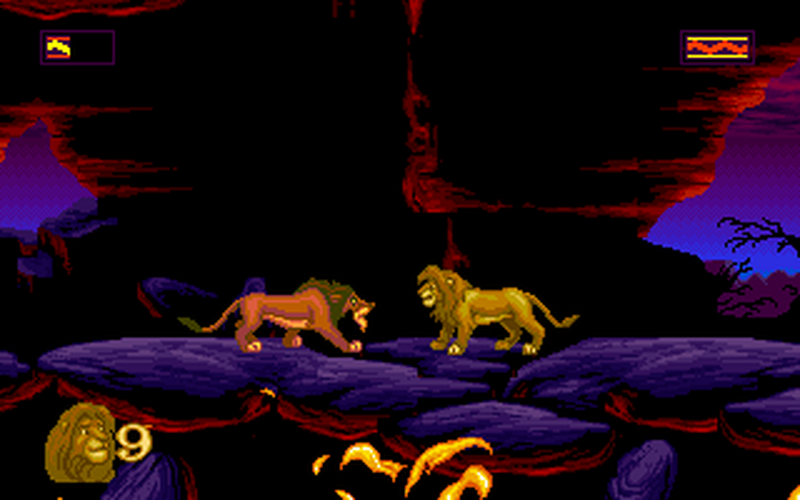
-Consoles with no saves eg.sega

-The mentality these were played with ie. short and snappy/time kill

-The difference now- long spanning story lines, previously impossible

-The use of pass codes cheats, returning to an achieved level vs. modern day cheats for fun. Such as the no gravity cheat for gta.                                                                                                      

- Autosaving
-Transfering game details to its sequel
-Game breaking through bad save choices

I have my ideas mapped out but I am yet to start the bulk of my writing therefore more work on this will be occuring and a rapid pace over the next couple of days.

More Tanking


Once I had decided to finish with the modeling I was advised to test the pieces out in UDK before I started work on anything else. The process for importing was pretty new to me in itself so I attended the Thursday tutorial with Lothar where we were shown how to do this. The process itself is pretty uncomplicated and just requires making an FBX export of the maya objects then opening this in UDK. We were also shown how to apply various maps to our object upon which I will go into more detail later.


The major problem I encountered was that segments of my model appeared to be missing. This is demonstrated in the picture below. The worse part of this was that it happened when I was supposed to be working at home for the day. I ended up coming into uni where Lothar was able to tell me where I had gone wrong.

The problem was with my mesh in maya. Some of the face normals had inverted and this had made them appear invisible within UDK. All this required was to select the affected faces and click normals> reverse. The picture below demonstrates how this appears when an object has the face normals visible.

Once this was sorted I carried on importing the various parts of my meshes, and continued to clear up any further inverted normals. Once I was satisfied they were all functioning correctly I was happy to start focusing on fixing my uvs.
 You can see some of the additional features of the tank in the picture below. Lothar advised me in one of our group crit sessions that I should be using as many as five or six different textures to complete the tank. With this in mind, once I had the various uvs mapped out I set about trying to arrange them into groups. Ideally I want them layed out as efficiently as possible so no space is wasted and the objects can make as much use as possible of the available texture.

 Another thing to bear in mind with the grouping of uvs was the pixel quality of the textures. Again this was brought up in our group crit where I was reminded to take into account what objects would use 1024x1024 textures, or 512x512 and so on. Obviously objects should be grouped with other objects that will be using the same. When it came to deciding how high quality the different parts should be the following site proved useful: http://freesdk.crydev.net/display/SDKDOC3/Asset+Guidelines

- "The texture size that you should use for an object is related to the .
amount of space that object will use on screen. For Crysis, Crytek aimed for a screen resolution of 800x600 pixels. Lets assume that the object will fill half the screens height at all time (600/2=300pixels); therefore, you should use at least a 256x256 screen ans 512x512 will be even better. The best case scenario will be to have 1 pixel on screen to represent one pixel in the texture. Of course this depends on how big the object is in all directions, as you cant reall translate the texture space in 2D directly to the amount of space it will use in 3D.
-Try to keep the texel ratios for all objects constant. This means that every object on screen uses roughly the same amount of texture pixels per meter. By doing this, you will ensure that all the objects have roughly the same sharpness on screen and that the textures dont look muddy
- Objects that are always on screen and at the same distance to the player (for example weapons) can use a higher texel ration in areas that are closest to the player (butt-stock, iron sights and the like)."

Due to the size of the tank, and the fact that the player will be able to study it relatively close up I decided the main body and turret would need to use a 1024x1024 map. meanwhile the other features could be smaller but I have not yet decide by how much.

I now have my uvs and objects all placed and grouped correctly so today I began creating my first texture. A  photoshop network can be created with maya so I can continually update the image in PS and check how it suits my model.
This takes me up to date for now, updates to follow

Sunday, 3 February 2013

Tauchpanzer model

     As mentioned before I am creating a Tauchpanzer model for this project, I already created a quick trial version to see how I would cope with this and have begun working on the real thing the last couple of weeks, unfortunately I was pretty ill in this time and had to take about a week out. Nevertheless I have made reasonable progress and developed a better understanding of Maya- though I will need to speed up my pace if I intend to meet the deadline. The images below outline my progress so far:

The biggest problem to begin with was to find some decent reference images, although there were many useful side profiles, a detailed front view was much harder to find. In the end I opted for the the two pictured here which are actually different models, as our game story alternates history somewhat the tank doesn't have to be exactly the same so this will be fine.

Next I began creating the main body of the tank, this has been halved so once it is ready I can duplicate it and get a symmetrical mesh, as well as it halfing some of the work I need to do. Since doing this in my trial version we were given a lecture in which we were discouraged from using the boolean tool. This made things difficult as I had used the difference tool to create the wheel arches on that attempt and so here had to work out an alternate way of doing this.


Once I had sorted this I extruded the next level of the tank, the part on which the gun would be mounted. This was relatively easy, just a case of extruding some basic shapes from the main mesh and adjusting them to replicate the angles of the tank.

After this I made the gun for the tank, at this point one of our tutors Lothar helped me out, advising to make the extra features of the tank as separate objects, which would make a lot of the shapes easier to produce, therefor the gun shape you see are actually two separate meshes.

The object here is a section of the tank track, these can be duplicated and angled, then slotted together to create the tracks for the tank. Lothar pointed out to me that this shape has excess geometry, edges that aren't being used for anything, and these should be deleted in order to make the shape more efficient. I built this shape starting with a cylinder, this was useful as the pivot for the object is already centred within the cylinder which makes it easier when it comes to angling it.

This is the cog that drives the tracks on the tank. For this Lothar showed me how to soften/harden edges on a mesh to give it a more, less curved look.

Cogwheel at the back of the tank- again this is made of two different meshes

 Track support and main wheels. Found the centre of the wheels difficult.
This is the track pieces duplicated and angled to create the tracks. Unfortunately I need to redo these. the geometry isn't correct and I need to fix the uvs before duplicating the shape. This will save time later.


These five images show some of the extra details I have added to the tank. Once more these are all separate from the main mesh. I want the end result of this project to look really impressive and I feel that creating mass detail will help this.

Images like this I find quite inspiring as well as useful to show me what kind of standard I should be striving for.
Sunday, 27 January 2013

Wolverine paint


Whilst my BA5 project was ongoing I decided to dedicate a little bit of time to something unrelated, I find that it helps to work on something different every now and then to prevent me getting bored or frustrated on time consuming tasks. I decided to do a digital paint as this is all still good practice and will help later in my project. I found a picture of Hugh Jackman's Wolverine to paint, this is a character who has been one of my favourites from a young age, particularly in the film versions. Another reason for picking this is because I am aware there is a detailed digital painting tutorial on youtube which I intended to use, I am aware that my methods are not the only way, or indeed quite often not the best way to achieve a result. However I find working through different tutorials I pick up many different methods and from these I can pick the ones that suit me best.
The tutorial I used can be located here: http://www.youtube.com/watch?v=M5DbDecn16o
Although I wanted to replicate the methods used in this tutorial I did not want to produce the same result therefore I based my drawing round an alternate image 


My work is not yet completely finished but I have a work in progress image to display what I have done so far. There are some areas I am really pleased with, Particularly the likeness in the face, the texture of his vest in the lower half of the image, and the definition in the arms. Some areas I can see that need improvement already are the left side of the neck, some of the shadows and making the material on the upper half of the body look less rigid and more natural.
     I am also finding the claws difficult to get right, hence they are not yet include however I intenfd to finish this piece of before to long and will update my progress then.

Sunday, 20 January 2013

Tank Trial

     As part of our new project we are required to create something where there is some kind of interactivity. For example design a level layout, or a small playable part of a mission. I have chosen to further some of the work I did in our last project and model the amphibious tank I made. As I am still not all that experienced with maya I have done a quick trial version to help me prepare for the real thing.

I began with pretty basic shapes with not too much detail which I have used to build the turret and the main body of the tank.

     Using the "chamfer vertices" tool I learnt how to make rounder shapes into the faces of the model from which I could extrude a rounder object like the gun, this is an improvement as before I would have just unioned another object onto it which would leave me with more difficult geometry.

These next two pictures demonstrate how I began making my tank track. I followed some steps that I found in a youtube tutorial: http://www.youtube.com/watch?v=BtG7vdwZsKw I basically started with a cylinder that I began to extrude faces from. The benefit of starting with the cylinder was that the pivot was already centralised within it which was handy when it came to rotating the tracks as in the picture below.
This picture shows the tank tracks all positioned, the next step was to place the wheels within them.
The wheels were pretty easy to make but I quite liked how they looked. This is where I decided to leave my model and begin working on the actual version, as I am particularly aware of the impending deadline.

Monday, 7 January 2013

Colour and Lighting

     Yesterday was our first day back at uni. We had a lecture on the use of colour and lighting within artwork and were told to analyse two images of our own on our blogs.

   
     The next image gives a basic example of refraction, demonstrating how travelling through a material can affect the movement of light.

  My second analysed image, from the game "Far Cry 3" has examples of purple fringing, something brought to our attention in the lecture.
Apple says purple fringing on iPhone 5 camera is normal
This often occurs in photographs with intense sunlight. Whilst technology such as cameras aim to remove this as much as possible, it can be included in artwork to add atmosphere of realism.

Wednesday, 5 December 2012

Island.

We're doing a project where we design an island. The whole year is working as one group. I am enthusiastic about this. 


     I drew a thing to go in the island. Its not the best thing in the world but its mine and I'd miss it if it left. Maybe I will take the time to alter and improve my thing until it is as good as some of the better things.