Thursday, 14 February 2013

Finishing up

I used today to put my assets into UDK. This was not without its issues and one of the first issues I hit seemed to be related to the trouble I had with the pasted wheels and tracks mentioned earlier in this blog. Whilst everything else worked fine importing these parts of the model resulted in this ungodly mess


This was obviously frustrating so late in the project, particularly as it had worked fine in my earlier exports to udk. I opted not to combine both tracks and their corresponding wheels and this seemed to prevent the problem.

    I began to create a specular map for my model. this is not the finest work I have produced on this project however time was of the essence and I was adamant that all the textures on my object should be my own. This I applied to certain parts of my tank, it took a while for me to get the settings right however it worked eventually.


Now that I had my object properly placed in a UDK level I wanted to add more to the scene. I spent some some time trying to create a new terrain and alter it however due to my unfamiliarity with the program this took a lot of time and I found I was not able to apply a material to it the same way as I had with my tank model. I decided to abandon this for now and instead just made a small enclosed area around the tank with some pre made UDK wall assets. I repeat. THE WALLS ARE READY MADE IN THE UDK AND PURELY THERE TO CONTRIBUTE TO THE SHORT FILM CLIP I WILL BE MAKING FOR THE LEVEL. I TOOK NO PART IN THE MAKING OF THESE WALL ASSETS. 


When I was learning about some of the UDK features in online tutorials I discovered some features like fog and lighting. Though this was not part of the project I felt I could try it out quickly so have created a very light foggy effect surrounding the tank area. I also learnt that I could move the players start point so it began in the tank area. Once this was done I added the collision meshes to my now completed UDK scene, then made a short video which has taken its sweet time to upload to youtube.


     I also went back into maya and created some nice mental ray images of my model as well as a couple of animated turntables just to document it outside of a game engine.

     It is pretty clear that I have not achieved everything I set out to do in the learning agreement. Whilst this is disappointing I am still very happy with the work I have done. Even though I am working into the final hours of this project window I am happy at least that I managed my time better than before and what I haven't achieved is not through lack of effort. My work in Maya has come on considerable since the start of this project and processes that would have taken me an age to complete beforehand I feel I could now achieve in a much shorter time frame. It is disappointing to not have been able to create the full scenery around my tank, or do more with texture, animate it or create the sequence trigger that I set out in my learning agreement. But I learnt a great deal already about game engines with which before I had no experience using.  Overall it would have been great to do more but I am still really pleased with what I have achieved.

Bye Bye Contextual

     I have now finished with my contextual studies, there was only a little left to finish off so this did not take long. I brought up one last theme within it which was how game saves have opened up a new type of mechanic. Here I looked particularly at games such as Prince of Persia and the indie classic Braid.

These titles have used in game memory to support a new style of gameplay where players can, or even must, backtrack in time to complete the level. Using game memory to innovate a completely new type of game mechanic definitely indicates that saving capability has changed the nature of gaming therefore this will definitely be included within my essay.

Contextual Studies Narrative

Another major theme I looked at for my contextual studies essay was the development of narrative with game saving. As players are no longer starting a game from scratch every time they turn the console on it has created long diverse narratives that can be progressed with each play.


     Games such as Fable and Mass Effect 3 are brilliant examples, with ME3 clocking up around 90 minutes of cut scene time, this would have been unfeasible to expect the audience to sit through every time they played a game, which is what would have to happen without game saving.


These two games and others such as Fallout 3 have opened up a new feature where players do not have to follow one linear path, but instead have multiple decisions, moral and tactical, to lead them upon their own unique personal narrative. This is possible and evident in some games before game saving but not anywhere near the extent we have now. Whats more these choices are all the more important when they are saved and not wiped away every time you turn the console off.
     A lot of this extended narrative has created the impression among audiences that games are becoming more and more like interactive movies or novels. I examine this in my essay using quotes from the following website which I feel has adressed this situation: http://themovieblog.com/2011/are-videogames-becoming-more-like-movies/

Wednesday, 13 February 2013

Tank Texture

     I have found another great website which has helped me with my model. Here someone has made a tank the same model as mine which has been really helpful to look at.
More information on the model can be found here http://www.antos.ca/freebies.htm


I have now stuck in to the texturing process of my work. This has led to several different developments.

Problems
The first issue I ran in to luckily occurred whilst I was at Uni. Therefore Lothar was able to show me how to fix it. I am not sure how it happened but I had manage to parent a lot of the objects in my scene unintentionally. This led to problems when I tried to duplicate some of my textured objects but was relatively easy to fix.

The second issue came later. I had organised the different textured group objects into corresponding layers, When I was rearranging these however it became impossible to remove certain objects from a layer. I was able to fix this eventually just by deleting and recreating the layer.

Texturing
Throughout this project a lot of people have looked to the internet for textures to use on their model. I have spent a lot of time working on my tank in Maya and am really proud of how my abilities have developed because of this. In keeping with this it was really important to me that my textures should be completely made from scratch. This has taken up a lot of my time and has forced me to work further into the last week of my deadline then I had hoped for however it is still something I am glad I made the choice to do- and furthermore it has been another big learning curve for me within this project.
I found a really helpful tutorial online that was actually made for a tank model which can be found here: http://www.moddb.com/tutorials/all-texturing-tutorial. This gave a fantastic step by step guide to creating colour layers, metallic textures, variations in shades, chips and damage, plus dirt, grime, and mud layers. Applied to the model this creates a really pleasing effect.
     Decals
Another step mentioned in the tutorial includes decals. It is important that the model isn't completely bare of any insignia as this will look unnatural. It is also important that these details must have suffered similar wear to  the rest of the tank.

I looked at images like this to make sure I obtained the right kind of decals. In the end I opted for a minimal touch, just including the tank number and a small logo.

Though the tank will be the same colour pretty much all over, I have adjusted the shades slightly on the different texture layers so there is some variation.
It was important to take into account what part of the tank I am texturing and how its surface may vary. This image shows the wheels layer which I decided , as it was closer the the ground and the various terrain rubble, would be heavier affected by chips, scratch, mud and grime. Again it seems like a small difference but it really helps once the whole tank has been textured.

Contextual Studies

My contextual studies is pretty much written up already at this point, there is only a few touch ups to make to  it before it is handed in. Here I will look at some of the resources and themes that have helped build my essay.

"Crashing Computers" by Michael Coleman is a particularly informative book, a part of "The Knowledge" series, and a lot more useful then the front cover might suggest. A lot of the information I know about advances in gaming and computers in general came from this book. It explores the development of gaming through history, as well as the technology that supports it. Though I am yet to use it for direct quotes it will be referenced in my bibliography as the information it contains has supported and helped build many of the points I have made.

Cheats

I look in some depth at the changing role of cheats in games now that game saving is introduced. Something I learnt from the book above was that in the past game developers used to use cheats to skip to certain levels when they were testing them. Similarly people playing them could use these cheats to the same purpose. My point is that since this is no longer necessary with games saving cheats have taken on a new role. Sometimes making the game easier, though examples of this existed beforehand as well, but more interestingly cheats are  now quite often used just for fun. A fantastic example of this is "GTA: San Andreas". The full cheat list was far too big to list on here, however the following link shows you just how extensive this is: http://www.gta-sanandreas.com/buttoncheats/index.php I have listed just a few of these cheats below to give an idea.


Weapons Cheat (Tier 1)
Entering the following button combination will add the following weapons to the players inventory:
Brass Knuckles, Baseball Bat, Colt. 45, Chrome Shotgun, Micro Uzi, AK-47, Country Rifle, Rocket Launcher, Molotov Cocktails, Spray Can.
R1, R2, L1, R2, Left, Down, Right, Up, Left, Down, Right, Up


Weapons Cheat (Tier 2)
Entering the following button combination will add the following weapons to the players inventory:
Knife, Desert Eagle, Sawn Off Shotgun, Tec-9, M4, Sniper Rifle, Flamethrower, Grenades, Fire Extinguisher.
R1, R2, L1, R2, Left, Down, Right, Up, Left, Down, Down, Left

Weapons Cheat (Tier 3)
Entering the following button combination will add the following weapons to the players inventory:
Chainsaw, Silenced Colt. 45, Riot Shotgun, MP5, M4, Heat Seeking Missiles, Satchel Charges.
R1, R2, L1, R2, Left, Down, Right, Up, Left, Down, Down, Down

Money, Health and Armor
This cheat will give the player $250,000, full health and full armor. If entered while inside a vehicle it will lose all engine damage and it's model will be repaired to perfect condition.
R1, R2, L1, X, Left, Down, Right, Up, Left, Down, Right, Up

Spawn A Jetpack
Entering the following cheat will add a Jetpack to the players inventory.
Left, Right, L1, L2, R1, R2, Up, Down, Left, Right

Spawn A Parachute
Entering the following cheat will add a Parachute to the players inventory.
Left, Right, L1, L2, R1, R2, R2, Up, Down, Right, L1

Super Jump
This cheat will make the player jump about ten times higher than normal. Be warned though, you'll lose health from the fall.
Note: Cheat can be turned off by re-entering the button combination.
Up, Up, Triangle, Triangle, Up, Up, Left, Right, Square, R2, R2

Super Bunnyhop
This cheat will make bunny hops launch you hundreds of feet into the air. Just find a bike and hold L1 then release to bunny hop.
Note: Cheat can be turned off by re-entering the button combination.
Triangle, Square, Circle, Circle, Square, Circle, Circle, L1, L2, L2, R1, R2

Ambient Occlusion

     As I was unwell during the week when our group received the lecture on ambient occlusions I had to catch up on this in my own time. This website http://www.3dtotal.com/tutorial/maya/video_tutorial_baking_ambient_occlusion/ambient_occlusion_01.php
was particularly useful when it came to going through the method which is actually fairly simple.
    
     An ambient occlusion applies a shadow effect to the model based on the ambient lighting, this can be applied to a texture map which should give it more depth when applied to a model. The next step for me was to try and apply this to my model.
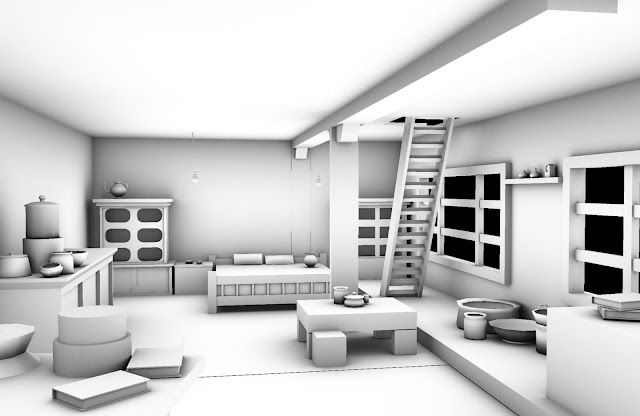
This image is my model when the ambient occlusion shader is applied. Up to this point it works fine however I am hitting a problem when it comes to batch baking it. I believe, though am not completely certain, that based on the error message given, the problem is with some of the duplicated wheels which maya is "unable to locate".
    As I have spent a large amount of time and multiple attempts on this already I am going to work with my texturing anyway. I will look to fix this problem later on if I have time as I am concerned if I don't progress now I am going to run out of time.

Tank Research

I have been looking at extensively at images of tauchpanzers to help me with texturing it, and also to influence some touch ups to the model.

I have found in particular that model kits of these tanks have been particularly useful for establishing some of the key features of the tank. Whilst useful to a point a lot of the photographs of this type of tank tend to be very old and poor quality, and therefore very difficult to establish detail from. Another good thing is that model making is usually such a serious and painstaking hobby that the models tend to be very accurate and are therefore fantastic resources.

There are a lot of different versions and additional features for this tank so it is important to look at as many different versions as possible to get the right idea for my model.

This image shows some of the waterproofing that can appear on the tanks. It would have been really nice for this project to include some fabrics and materials, however at this point I would not have the time to do this. However it is something I would like to try in a future project.

I found this uncompleted model was particularly useful when it came to building the wheel struts, as this was generally hidden from view in most of the images I have found. I feel that paying attention to some of these extra details, even if they are not immediately visible, contributes to making my model a little more realistic and impressive.

I need to come away from this project with the model version of this.