Friday, 30 March 2012

Catching up.

     It is coming up to the end of the first week of our Easter holidays and the last seven days havn't exactly been productive. There are several aspects of my course that I am struggling with at the moment and this has made approaching some of the projects more difficult. One of the things that is bothering me most of all is the sessions we have begun to help us with digital modelling, and more specifically my lack of progress in these sessions. One of our project briefs for this term is to study the architecture within a particular game, and then create it as a digital model. To prepare us for this we are going through practice session trying to create the "companion cube" from "Portal", which should hopefully teach us the skills we need in order to create our own door/window etc. The main problem for me has been that in the last session I fell behind right at the start and was unable to catch up, making virtually no progress throughout the entire lesson. To try and make up for this I have set aside some time today in which to tackle this project and try to catch up.

     The image above is of the evasive little sod I have thus been unable to create. One of the things that held me back at the star of our second session was that my workplane images of this cube had disappeared, and I had forgotten how to get them back. To document my work today, and to help me remember these steps, I will list instructions on methods such as these which I have previously forgotten. To get this workplane image up one should: switch to orthographic view> click view> image plane> import image. Once the image is loaded up you can adjust height/width etc from the right hand side.


          I now have my work plane images in place, and can use this as a guideline for creating the other features of the cube. As you can see from the image, I have also started creating the first small extrusion on the cube. Our second session focused on shaping this extrusion so I will begin this now. After completion of this I will then be up to date with the progress of this work.


Wednesday, 21 March 2012

My character

     I have now come up with a rough design for the character I will be creating for the "armed and dangerous" competition. I knew I wanted a large Samoan character to fit with my tattoo design and so started out with a very basic sketch indicating the form and posture.

     From here I began to further the design, adding features such as armour. I knew a large part of my character would have a strong tribal theme so for the armour I tried to make it more mechanical, so as to contrast slightly with the rest of the character.

     I liked the idea of a more permanent armour that was fixed to the character's body, hence the metal plates are bolted to his skin. I was inspired slightly by the characters from the film series "Predator" where you see a charater that initally comes across as primal and somewhat primitive, but have at the same time been equippied with futuristic sci fi armour and weaponry. Whilst I would not consider my character's armour to be overly futuristic I still feel that it holds certain familiarities.

     With a design in place I will now begin to plan and create this character in mudbox.

Sunday, 18 March 2012

Armed and Dangerous

     I am currently brainstorming for ideas of an "armed and dangerous" character. The competion rules specified that this could be taken literally ie. a strong warrior character, or this could be implied in a more humourous manner, eg. doctor with a large syringe.
     Recently I have had an interest in the type of heritage tattoos used by Samoan and Maori cultures. I decided to start off using this as a source of inspiration for a character. Deciding that one of his arms would be covered by this type of tattoo I decided to design one for myself.
                         These are the reference images I found to give me an idea for the kinds of patterns I should use


     This is the design that I then came up with:


      I will now be focusing on creating a character which which I can incorperate this tattoo design

Starting BA3

     Since my last post we have handed in our final work for BA2, and started our third and final projects in BA3. The first work we were given was to take part in an online competition which in someway required using some of the skills we learnt in our previous project, Three suggested competitions were
the 2D drawing challenges at CGHUB, digital sculpting at CGSOCIETY, and animation at 11SECONDCLUB. The one I was attracted to at first was the digital sculpting competition, therefore I will need to start coming up with ideas for the "Armed and Dangerous" competition.
Mudbox Challenge - Armed and Dangerous

Sunday, 26 February 2012

Researching

     There hasn't been much posting on here recently about my upcoming essay for contextual studies. I am looking at the roles and practises of both concept artists and 3d modellers within today games industry. Below are some of the sites I used for research purposes.
     http://www.theaveragegamer.com/2011/06/24/friday-feature-you-dont-want-to-work-in-the-games-industry/
     http://www.businessweek.com/innovate/content/aug2007/id20070813_120384.htm
     I have also looked withing various games magazines, primarily "Xbox World" as well as referencing from our lecture with the artists from Crytek.

Topology

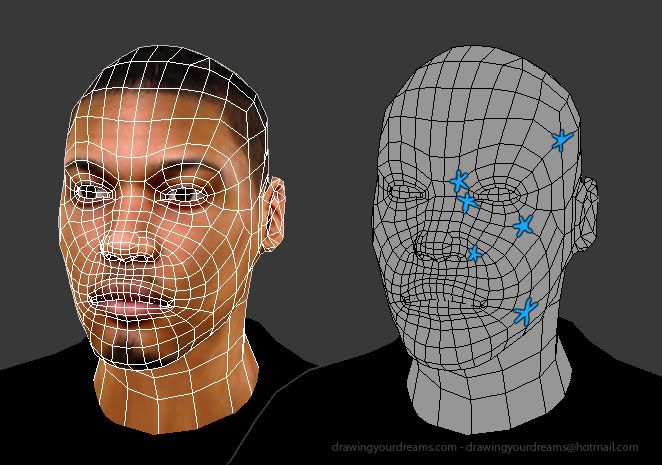
     After finishing our sculpts we were required to create a paint layer over them displaying our understanding of Topology. To give myself a decent understanding and further what I had learnt within our group session I found the information in the following post to be particularly helpful. - http://www.polycount.com/forum/showthread.php?t=80005


        What I understand now about topology is that, as a general rule, the intention is to avoid the inclusion of triangles, primarily because they tend not to deform well which becomes problematic should you wish to animate your sculpture. Instead one would try to keep the shapes as quads, however this can be difficult when the contours of the face start splaying off in different directions. At this point you may include "5poles". This is where the edges of five quads meet to form a polygon cluster (These are highlighted on the picture above). Whilst they can also be detrimental to animation, this tends to be less so than with triangles.
     Armed with this knowledge I then attempted to draw out the Topology on my own sculpture.


    Result: He looks like a Mickey Rourke/ Spiderman hybrid. Using the website as a guide I did my best to keep the 5poles to a minimum and within the areas they would be least inconvenient. I did not enjoy this exercise.

Mickey Finished

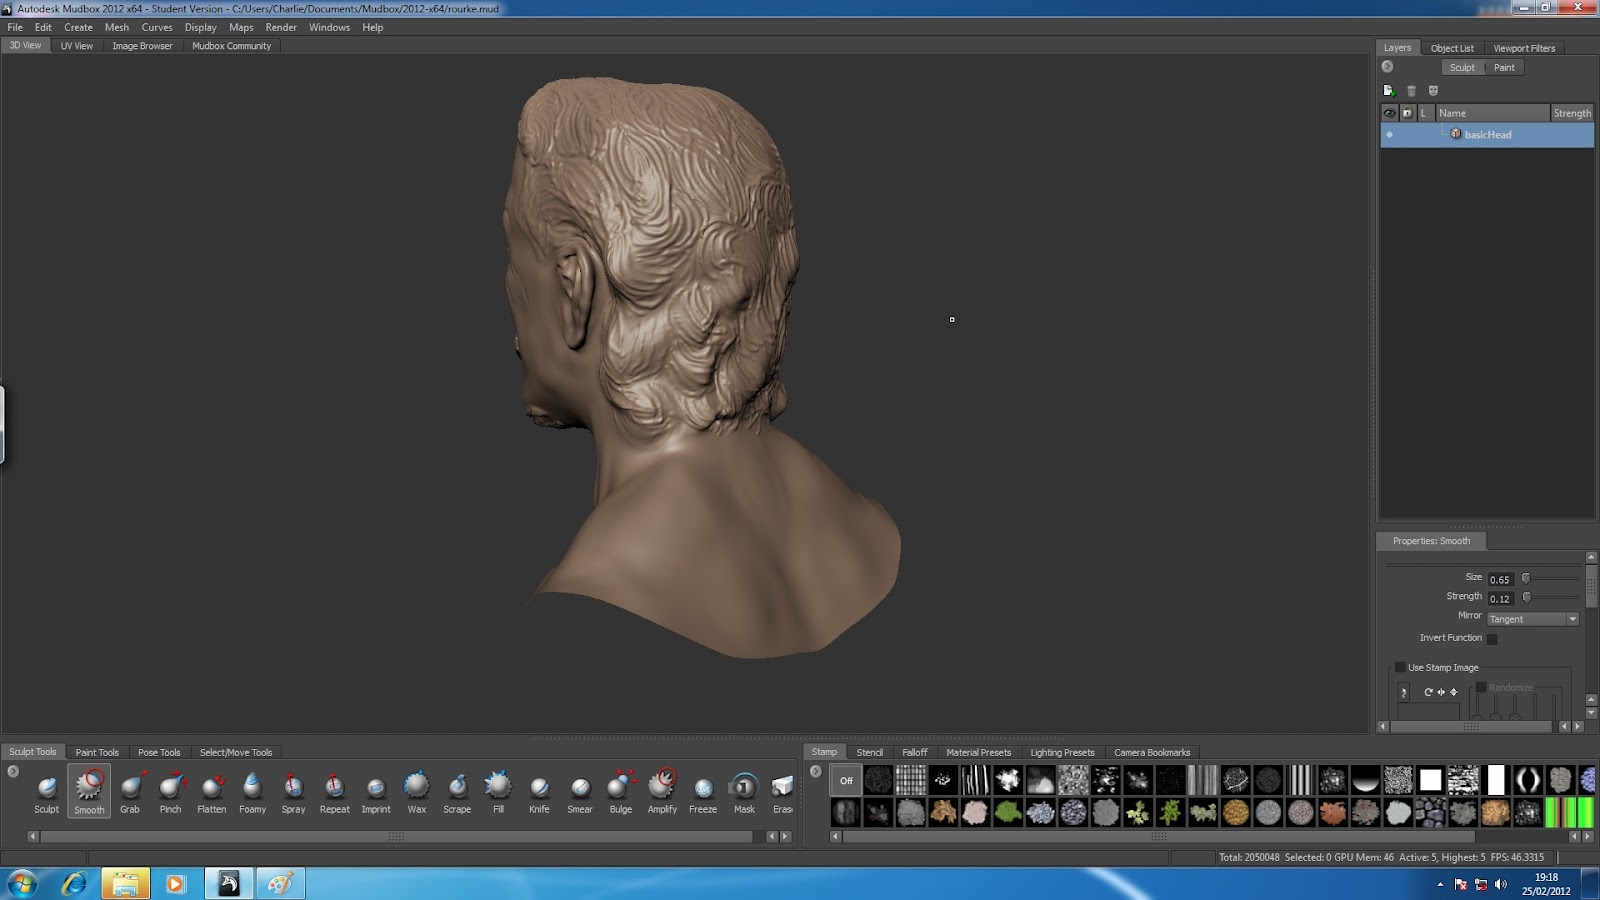
     The time has come. I have finally got my scuplture to (roughly) where I want it. Witness for yourselves..

     I am pretty happy with my progress in this area, particularly seeing as it is my first time using Mudbox- and I feel as though I have at least achieved a reasonable likeness. As mentioned in my earlier posts I did find the eyes a struggle so this is something I will focus on practising for the future; however I really enjoyed using the program so I am more than happy to do this. Whilst playing around with different features in my free time I also learned how to give the sculpts joints, and therefore intead to start creating 3D sculpts of characters I have been creating/drawing in my own time.
     Another aspect I didnt explore too much this time round but would like to become familiar with in the future is various methods of texturing/colouring the surface so as to create a truly realistic effect.