Showing posts with label BA3. Show all posts

Sunday, 13 May 2012

A most relieved update. But its still not going right!

     Ok so here's the score. I managed to get a friend on the course, namely Robin Silcock, to do the render views on her (working) version of maya. I managed to sort out my texture at the same time and eventually found a code that allowed me to do render views on my (broken) version of Maya. So I had working lights models and textures. The process distorted my door somehow along the way but i pinched an earlier copy so its all good.

     I kind of like it it took long enough.

The main issue now is that when I try to render my vid, it comes out particularly stuttery. I have attempted different cameras, angles, distances, frame rates, directions etc. with no real solution. Having looked it up on the internet and checked my file size, I think it may be that the file is excessively large, however I have no clue as to why this would be the case and how to solve it. So unless I am able to work something out I am simply picking the best version I can find. My project folder is also being submitted so it is thankfully possible to view the model outside of the video as well.

     I have found a solution to the stuttering via windows movie maker, however I am struggling to make my video do the full turntable, it is not playing the same amount that it does before I import it.
I have even imported a what should be a full 360 rotation, only to find it barely does a quarter turn. Im sure the problem is fairly basic, and I intend to find out where I was going wrong, but for now I have spent a lot of time trying to fix this and seem to be getting nowhere so I will just have to submit the video as it comes. Luckily I do have my project folders so my work can at least be viewed properly that way.
      With foresight I would have opened up the cave part of the door so there was more room for a camera in there, as you should technically not be able to see any of the outside part in this picture- within the game this would all be covered by rock structure.
     As I used previously created images or textures within my work I now need to reference these:


http://fallout.wikia.com/wiki/Vault_101


Below are some additonal images I used to aid me with the creation of my door. They were of limited use.


      I am a little frustrated as the end of my project is coming together, I feel I spent quite an amount of time modelling only to let it down when it came to rendering, however at the same time I feel I've learnt a lot within this project and look forward to taking those skills further.

Making a door the highs and lows.


Since starting the door project, I have been documenting via screenshots the various stages of progress.


     The first screenshot is technically my second go at it. My first trial at making the door was not the most efficient method of tackiling it, I was advised by a tutor to make a segment and use the "duplicate special tool" to complete the circle. giving me something that added up much better dimensionally. Making it easier to work with.
 I extrudeded faces on this shape to make the main ridges going around it. To finish it off into the shape I want, the merge vetex tool i have found to be particularly useful.

 Again I used the extrude faces/merge vertex tools to create other various geometry in my work
Here I have created the control panel for my work, I made it with basic shapes that I used the boolean union tool on. This was a speedy process for once which made me feel a little better about Maya in general. I've not icluded the panel buttons as these will be included with the texture.

     This is the point where I started applying textures and things went wrong. Whilst the textures seemed fine on college computers, when I took my work home for some reason the one on the back wall becomes increasing blurry.

       I encountered a greater problem when i started trying to work with lighting, a bug with the 2012 version of Maya (see here) http://3dg.me/3d-graphics/maya/fix-for-maya-2012-error-setparent-object-renderview-not-found, has made it impossible for me to do a quick render to check my scene. When trying to download a service pack that would fix this, it failed after downloading and caused further problems. Primarily it corrupted my most recent save file, meaning I had to redo my textures, bring the rest of the file up to speed, and deal with frequent crashes, particularly when I tried to apply textures. At this point I am slightly concerned about how to fix this....

Wednesday, 25 April 2012

Architecture


          The Companion Cube work discussed earlier in my blog has been preparing for the part of our project where we create our own replica of a door/window that we have found within a game.
     The game I have chosen for this task is Fallout 3. This provides a fascinating example as the architecture contrasts so much. Though Fallout is set in the future, within the plot the earth's development became somewhat dysfunctional around the 50s when the wars started. This means throughout the game you consistenly see sci-fi technology couples with old fashioned advertising posters, sporting equipment and general decor. Another consideration has been that with environmental features such as burned out cars, constructions put together from scrap etc. These also have to reflect the 50's era as they are residue from that time, and seperate from the technological advances of the present day within the game. The video below is the intro of the game which I feel effectively sets the scene.
     When focusing upon the achitectural style of the game it is important to take notice of the sense of total delapidation throughout. This is a world where industry and mass production has long since been extinct. The "Capital Wasteland" is exactly that, and abundence of decay and destruction. The next video is an example of someone's own version of the Fallout world. Whilst not directly related to what I am doing, I found it both interesting and benificial to see which elements of the environment, and the game in general, had been carried across.
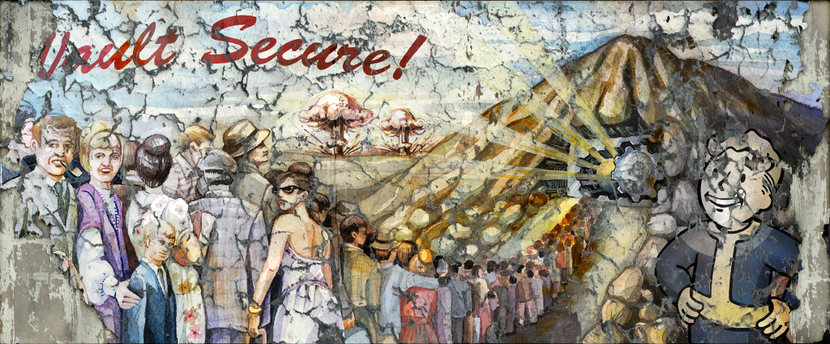
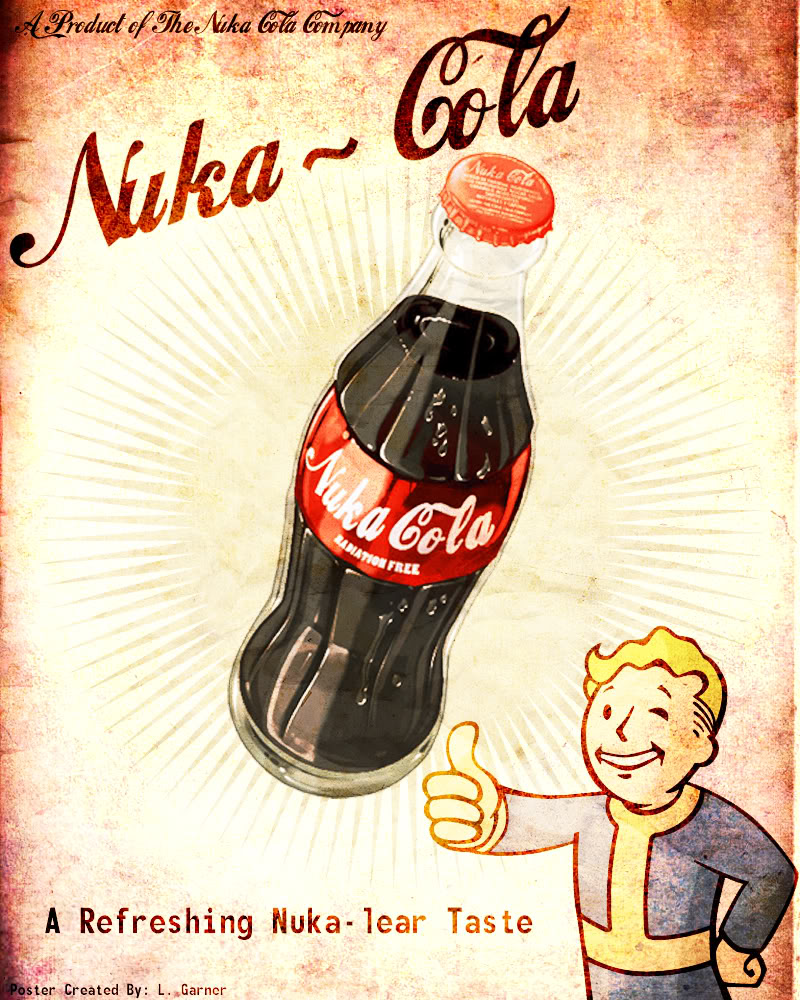
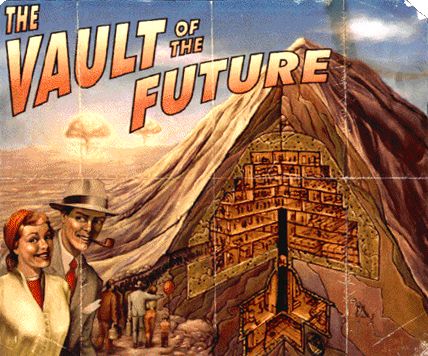
Below we see examples of the traditional style posters, and what these add visually to the game. As you can see they encompass the idea of the American Dream, and the marketing formats through posters and leaflets in that time.
VaultTecVaultSecure.png

Votf.jpg

Now we see some examples of the heavily featured, extreme sci fi, tech in the pictures below- and furthermore just how extensively these contrast with the 50's theme.

Vault 101.jpg
Command PostFOBOS.png
VaultComputer.png


These images display an immaculate almost clinical quality- This also contrasts with the destruction of the wasteland as seen below.


Just to re-enforce the 50's theme, an example of a diner style wreckage. JUST LIKE THEY HAD IN "GREESE"!!!!!


AND AST BUT NOT LEAST AN ENTIRE ELVIS THEMED BUILDING (although technically this is from Fallout:New Vegas


More to come....

Wednesday, 18 April 2012

More Companion Cube

     Here is some more of my joyous attempts to make one small part of the companion cube.

      Before carrying on with the process, something useful we learnt was to use one of the new layer buttons (bottom right of screen) to take any selected ovbjects and assign them to a new layer. This enabled me to have either parts of the cube visible/invisible at any given time. This can help to make the task less complicated, and helps prevent accidental selection of objects.


     My next step was to bevel the edges of the shape using, suprisingly enough, the bevel tool. All that was required was to right click, opt for edge selection, select desired edge, select bevel option and kaboom!.. In honesty there was no kaboom,

      I also had to use the merge vertices tool. This allowed me to take two corners and merge them into one. The process in maya give you a little red cross, much like a targeting reticle, in order to select these desired vertices.

     
       As you see in the picture below, to further the shape I needed extra edges running through the middle of the shape. This was achieved by selecting the already existing central one and using the insert offset loop tool. This offset can then be adjusted as you wish, enabling me to create the change you can see below

Sunday, 15 April 2012

Drawing Jam

     I have now begun work for the current Drawing Jam (number 73) on cghub. The challenge this time is to create my own version of the grim reaper in any kind of 2D format. The pictures below show my planning and initial work on this project so far. This will need to be finished for the 23rd April.


Initially I had planned out a completely modern version in suit with a baseball bat instead of a scythe and with a more human face, however this removed too many of the features that identified the character, hence the altered version you see now. The wide brimmed hat is inspired by Captain Barbossa's from "Pirates of the Carribean", I did however decide to leave out the giant feather.  Although the image depicts otherwise, for my final version I intend to have the head as an extremely emaciated form- as opposed to a complete skull. More work to follow.

Barbossa and his hat.

PRACTICE

     Before I started entering competitions on cghub I wanted to try my hand at a couple of pactices first, as digital ainting is something I am pretty unfamiliar with. I was advised to start buying the digital art magazine "ImagineFX". In  my first copy one of their main articles was explaining how to make a portrait style piece of work so I thought I would try this first.

      I decided to use a photo of a friend who I knew wouldn't be too offended if the end result was slighty dodgy...
      Which was probably just as well. I am aware that there is a lot wrong with this image; however it was my first time trying anything of the sort and with this in mind I think it could have been a lot worse. The main thing is that I learnt a lot from the experience and it set me up to try another.

     My next practice session was to create my own character completely from scratch. This was something I hadn't tried before with digital painting. My previous work had all been guided by images that already existed.
I started out with a quick sketch of a character idea, once I was pleased with its basic form I scanned this to my computer. (Havn't invested in photoshop yet so I am still currently using GIMP).

      The next picture is some way in to my work. I was advised beforehand to use an alternative background to white when creating my image. Something else I need to focus on is learning to work without excessive use the smudge tool. Again I have been advised that this is not the thing to do and that it would be worthwhile to practise blending technique. Otherwise I could become somewhat limited in the visual style of my work.
    This is my work in its finished state. Again it is not fantastic, especially in comparison to some of the phenominal work I have seen online. However this is the first time I have completely created something from scratch and brought it through to a completed piece, for that alone I am happy with what I have created here. Once again I have learnt a lot from this process and look forward to developing my techniques further.

Change of plans

     I know it's bad but this is gonna be another one of those update posts where I recap the last week or so. As mentioned before I had planned to enter the armed and dangerous comp ending 10th April, which required me to submit a fully sculpted and painted piece of work. Having only used Mudbox once before my handling of this task was pretty slow, and I had no experience in creating a sculpt that wasnt still in unpainted form. Therefore as the deadline grew closer I grew more apprehensive about getting this task done in time, sure enough the deadline came and went without me submitting. Whilst I definately want to get round to completing this, (digital sculpting is something that I want to be able to do with skill), I decided that if I was to enter comps with deadlines I may be better off trying out those based on 2D drawing. Futhermore digital painting was something I really wanted to get to grips with in my first year, and as yet it is not something I feel I have spent any real time focusing on. Therefore I am now a member of cghub.com where I can join their competitions, as well as posting my work.

Friday, 30 March 2012

Catching up.

     It is coming up to the end of the first week of our Easter holidays and the last seven days havn't exactly been productive. There are several aspects of my course that I am struggling with at the moment and this has made approaching some of the projects more difficult. One of the things that is bothering me most of all is the sessions we have begun to help us with digital modelling, and more specifically my lack of progress in these sessions. One of our project briefs for this term is to study the architecture within a particular game, and then create it as a digital model. To prepare us for this we are going through practice session trying to create the "companion cube" from "Portal", which should hopefully teach us the skills we need in order to create our own door/window etc. The main problem for me has been that in the last session I fell behind right at the start and was unable to catch up, making virtually no progress throughout the entire lesson. To try and make up for this I have set aside some time today in which to tackle this project and try to catch up.

     The image above is of the evasive little sod I have thus been unable to create. One of the things that held me back at the star of our second session was that my workplane images of this cube had disappeared, and I had forgotten how to get them back. To document my work today, and to help me remember these steps, I will list instructions on methods such as these which I have previously forgotten. To get this workplane image up one should: switch to orthographic view> click view> image plane> import image. Once the image is loaded up you can adjust height/width etc from the right hand side.


          I now have my work plane images in place, and can use this as a guideline for creating the other features of the cube. As you can see from the image, I have also started creating the first small extrusion on the cube. Our second session focused on shaping this extrusion so I will begin this now. After completion of this I will then be up to date with the progress of this work.


Wednesday, 21 March 2012

My character

     I have now come up with a rough design for the character I will be creating for the "armed and dangerous" competition. I knew I wanted a large Samoan character to fit with my tattoo design and so started out with a very basic sketch indicating the form and posture.

     From here I began to further the design, adding features such as armour. I knew a large part of my character would have a strong tribal theme so for the armour I tried to make it more mechanical, so as to contrast slightly with the rest of the character.

     I liked the idea of a more permanent armour that was fixed to the character's body, hence the metal plates are bolted to his skin. I was inspired slightly by the characters from the film series "Predator" where you see a charater that initally comes across as primal and somewhat primitive, but have at the same time been equippied with futuristic sci fi armour and weaponry. Whilst I would not consider my character's armour to be overly futuristic I still feel that it holds certain familiarities.

     With a design in place I will now begin to plan and create this character in mudbox.

Sunday, 18 March 2012

Armed and Dangerous

     I am currently brainstorming for ideas of an "armed and dangerous" character. The competion rules specified that this could be taken literally ie. a strong warrior character, or this could be implied in a more humourous manner, eg. doctor with a large syringe.
     Recently I have had an interest in the type of heritage tattoos used by Samoan and Maori cultures. I decided to start off using this as a source of inspiration for a character. Deciding that one of his arms would be covered by this type of tattoo I decided to design one for myself.
                         These are the reference images I found to give me an idea for the kinds of patterns I should use


     This is the design that I then came up with:


      I will now be focusing on creating a character which which I can incorperate this tattoo design

Starting BA3

     Since my last post we have handed in our final work for BA2, and started our third and final projects in BA3. The first work we were given was to take part in an online competition which in someway required using some of the skills we learnt in our previous project, Three suggested competitions were
the 2D drawing challenges at CGHUB, digital sculpting at CGSOCIETY, and animation at 11SECONDCLUB. The one I was attracted to at first was the digital sculpting competition, therefore I will need to start coming up with ideas for the "Armed and Dangerous" competition.
Mudbox Challenge - Armed and Dangerous